Lovely Followers

Monday 27 September 2010

BWC New Lipsticks Swatches

A lot of work has gone in to researching and creating a stunning new range of lipsticks, eye shadows, concealers, pencils and nail polishes. More lines are expected in the future.


I was amazed at how pigmented these are considering they are naturally based, paraben free lipsticks.


click on any of the photographs for larger versions of the swatches.
Beauty Without Cruelty is one of my favourite all time brands, it stands for everything a great make up brand should be, quality with no compromises.


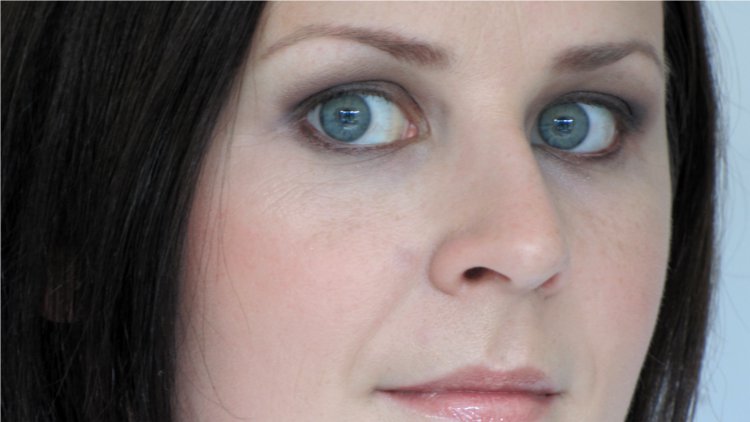
The darker shades of the lipstick can be used as lipstains as they are so pigmented, which makes them long wearing but they are not drying. A lot of the colours aren't too frosty either, but beautiful bold and sheer colours. These are very buildable, one layer will do fine for a wash of colour, another layer will add intensity. The lipsticks are glossy and moisturising without being too slippery or buttery. I wore this lipstick to the launch and it lasted from 6am to lunch time without any touch ups or primer.


For an every day colour to suit lighter skin tones, you can't go wrong with Tea Rose - which is a soft warm pink.


One of my favourites and top pick is called Azalea which is a deep hot pink (2nd in from the right).

I used the colour Wild Watermelon on my friend Julia for her band photoshoot yesterday, she loves the colour!

The design of the packaging is sleek and pretty in a black and white swan head repeating pattern. It is only a shame that many High Street retailers do not stock BWC, I can only wonder why as it is such a beautifully packaged and quality brand. I am lucky, there is a stand in my local independent department store - Boswells of Oxford.


You can buy and I suggest you do investigate these lipsticks from the online store at £9.99 each. All Beauty without Cruelty products are supported by the Vegan Society and Animal Aid groups!

See a video from the launch day here!


I was sent a few items of the ranges for review but I will be purchasing more as the product lines increase and are released. I will also post up a review and swatches of 8 of the loose mineral eye shadows I have been using.

Saturday 25 September 2010

e.l.f Lipsticks - Swatches and review

Most of Europe has been waiting for the new lipsticks from the core line to arrive. I have been playing with these for a few weeks. A mighty cold sore meant that only now have I had the chance to put them on my lips!

Six colours are currently available, Posh, Gipsy, Voodoo, Seductive, Fantasy and Classy. They are normal sized lipsticks in clever silver and clear packaging. The middle of the tube is clear so you can see the colour before you open it, very clever if you're like me and have lots stored together.


From the swatches below (on white and Asian skin) you can see that they are fairly well pigmented. Click on any of the images for a larger (and I mean huge) close up!


The colours come out pretty true to how they appear in the bullet, only Classy is a bit more sheer, but it is a lovely nude blue toned pink.


My favourite has to be Voodoo, it's a very wearable rusty pink. I think that there is something for everyone in this range. In fact I can seem myself wearing all of these apart from Classy as I do not favour blue/pink tones, they tend to make me look cyanotic.


On the lips they feel soft and moisturising, much more so than some of the e.l.f mineral lipsticks. As they are quite creamy, the sacrifice seems to be how long they last on the lips. With some of the lighter colours a touch up every hour will be necessary. Not so much with the darker colours as they have more of a staining effect. I didn't feel the need for a gloss with these lipsticks because they are glossy and creamy. A good point to note as these are very soft if left in warm conditions, so when using it, don't twist it all the way up or it will snap easily! Just a warning, it's going to happen to me I know it!


Asian skin, no flash, natural light


White skin, no flash, natural light


The bullets.


e.l.f lipsticks are available from the e.l.f website and priced at £1.50 each.


These lipsticks were provided for review purposes, I am affiliated with e.l.f Cosmetics UK but this is not a sponsored post.


My Hero Product

My hero product is Karin Herzog Glyco Rose Gel. It is a medium concentrate glycolic acid treatment for scars, uneven skin tone and skin rejuvenation. I absolutely love it and use it at least once a week to pep up and freshen dull skin.

If you haven't tried a chemical exfoliant before, it is always advisable to patch test for sensitivity for at least 24 hours before using.

I have recommended this product to women and men for the treatment of fine lines, dark marks left from sun exposure, acne pock marks and uneven skin tone. I also get those little white head spots, which aren't whiteheads as they are impossible to remove through squeezing. They are little balls of fat and skin which are trapped under the skin. Only a chemical exfoliant is going to remove those without scarring. I must stress that these are just recommendations, you must seek professional advice when considering these treatments for your skin issues.

Simply apply a small amount in a thin layer to cleansed skin and leave for at least 10 minutes. Do not apply to the lips or eyelids but I do use it around and under the eyes for any fine lines. It seems to help keep them at bay. Do not rub in. You will feel your skin heat up slightly, if it becomes unbearable then take it off, but it should calm down after a few moments.I'm not going to lie to you, it can feel stingy, especially if you have a couple of spots already. It seems to help clear them out though and they heal a lot quicker after a blast.

You can use this product for up to 30 minutes. You can the remove it with warm water and a cloth/cotton wool or neutralise it with Karin Herzog facial oil to remove later. Your skin will be left feeling soft and glowy. Moisturise well and avoid make up for at least 12 hours to see the full benefit. You skin won't peel off in huge strips, the work has been done so you won't see any flaking or peeling. You will see the effect after first use and more benefit after several treatments.

Before embarking on this treatment, do have a careful think about what you have to do to protect the new skin underneath. Moisturise well, avoid make up for 12 hours, your skin will be sensitive during and after for a few hours and you MUST use a sun block.

Price = £40. If you'd like to know more about the benefits of this product for acne and smoothing the skin, then follow this link to the Karin Herzog website where you can order online.

Size = 30 ml (about the same size as a small perfume bottle)

Value for money? I've had my bottle for over six months and it is still nearly full as only a small sized amount is used per treatment. So it is going to last a long time.

Innovation, I have tried other glycolic acid products, all of which were a little harsh on my sensitive skin. I haven't had any problems with this product and I will be pleased to purchase it when this runs out (in a couple of years!!).

Do you have any skin hero products you'd like to share?

This product was provided for review purposes.

Friday 24 September 2010

Concession? More like CON-SESSION!

I recently left a comment on one of my favourite blogs - Lipglossiping (go check it out immediately after reading this!). The post was about make up snobbery, it's true as you become a hardened addict and user of make up, seeing the same brands on the shelves loses its appeal. I now actively search for new and interesting brands to try. Obviously being cruelty free means that most new collections from the higher end are not applicable to me so I feel somewhat relieved about that, so is my husband and bank balance.

Proper well priced make up to me is not sold in stores, it is found online. Remove the middle man (shops) and you get a decent price. More importantly to me, the workers, manufacturers and brand get a decent profit too. Brands who sell in stores on average make only 15 - 20% of the sale price of THEIR brands in stores. The store takes the rest in return for dirty stands, surly staff and ruined packaging. At least online you know that the product you are getting has not been opened, messed about with or ruined by others. It sits quietly in a cool warehouse (perfect temperatures for keeping make up, not in a hot brightly lit store), waiting to be picked and packed.

So think about that next time you're in a shop perusing the latest collection, is it really value for money or just cheap make up? There is a huge difference.

I am a big fan on online make up, you take your chances when buying in terms of colour selection but you know you're getting a quality product at a reasonable price rather than a cheap product at an artificially inflated price. Check out e.l.f, Lily Lolo, Beauty Without Cruelty and be amazed at the value for money you are getting compared to a similarly priced product in a store.

So do you think concessions in stores are Con-Sessions? I do.

Tuesday 21 September 2010

Alva Skin Care Tutorial

I was comissioned to make a skin care tutorial using Alva Natural Cosmetics. Having used the range for several weeks, I felt confident I could recommend it to others in this tutorial.

I wouldn't say that this brand feels luxurious, there is something minimal, elegant and functional about this brand. It doesn't have any powerful colours or smells but I found the products to be effective and gentle.

Most of all it is organic and cruelty free.

Saturday 18 September 2010

Desert Haze Nails

I have had a bottle of e.l.f Desert Haze in my collection since it came out a few months ago. I thought is was nice but I wasn't drawn to it like I was with smoky brown or lilac. So I've only just used it! I really have nothing else like it in my collection and decided to use it as I wanted to paint my nails in something which would last a few days and not require too much thought about outfits and clashing colours. Just because I am feeling lazy doesn't mean that I can't have painted nails. I think Desert Haze is just that, something I can wear any time and with any outfit.


In the bottle it looks like a light cream butterscotch colour, two coats later and I can definitely see that it is more of a pale smokey lilac. There is no shimmer, it's a pale and glossy finish.


I really wish that I had used this earlier as now I am completely in love with it! It's a perfect work friendly, elegant and feminine colour. I also like is that the tip wear isn't very noticeable.


e.l.f Desert Haze is available from the e.l.f Cosmetics UK website for £1.50.


I am affiliated with e.l.f Cosmetics, but this is not a sponsored post.


Friday 17 September 2010

Alva Coleur Make Up Tutorials

I have been commissioned to make a series of easy to follow tutorials for the Alva Natural Cosmetics range. I used my friend Julia as my model as the colours really suited her skin tone.

I hope you enjoy these videos of me doing someone else's make up for a change!


Thursday 16 September 2010

Interview on IndianFashionDiva.com

Here's a link to an interview I gave to a new website called Indian Fashion Diva.

http://indianfashiondiva.com/interview-with-oxford-jasmine/article-detail/4

Wednesday 15 September 2010

P2 Dangerous Nail Polish


A few months ago I swapped a few items with a good friend and equal make up fiend in Germany. She sent me a nail polish by P2. I really liked it and asked her to send me some more when we next swapped.


The other day I decided to wear the colour "dangerous" which is a dark teal colour. Dangerous is a deep rich colour, there is no shimmer. So what you get in the bottle is what after two coats, you get on your nails. I instantly loved it. I am tempted to see how it looks with an irridescent top coat or turquoise glitter but I am resisting the urge so far.

From my limited knowledge, someone correct me please if I am wrong, gel (or jellies) based nail polishes seem to be much better for bold colours. They go on like a charm and dry much faster but they feel a little thicker on the nails. I don't have many gel based nail polishes, but I quite like these and how smooth they feel on the nails.

It has lasted quite well, I have been wearing it for four days, but now it is time to take it off as it is starting to chip. Not badly but it is always more noticeable with dark colours. I didn't use a top coat so might even last longer.

The other thing I like about this colour is during the day it looks blue and in artificial lighting it looks more dark green.

Monday 13 September 2010

Eye Brow Stencils by Miss Bollywood

I have a couple of sets of eye brow stencils. I like to use them when I can't get in to a town for threading.

I was sent a set of Legends stencils by Miss Bollywood which are available from their website for £10. The kit is fairly straightforward to use, the only thing requiring any skill is to pick the shape of brow and place the stencil in the right place.

I have found these incredibly useful as I always have one eye brow which isn't the same shape as my favourite brow. I also used these on my sister the other day, following the instructions in my video below. She was a bit hesistant but I assured her that they would grow back! For years she's had neat eyebrows but they weren't a natural shape and she just looked a little surprised most of the time as they were too lifted at the tails. We've all done that with our eyebrows, I am trying to grow the tails of mine so they point downward following my browbone. My eyebrows are quite sparse due to hair loss but grow long so filling them in keeps them looking neat and shapely.

It was really easy to use the kit on myself and even easier to use on my sister. I have to say trimming her "virgin - never been trimmed" eyebrows was really satisfying! The results were very good, but she needs a little time to get used to the new shape and they need to regrow to follow the shape of her brow, just like mine.

So I'd recommend this kit or any stencil kit as long as you're happy with the brow shape they give you.

See my video below for a demonstration.

Friday 10 September 2010

Rebel Rebel! Chrome Nails Giveaway

A few months ago, my nails were feeling very grotty and weak, so I investigated nail stickers as I was on a nail polish ban to get my nails back to health. It worked by the way but I am still careful not to apply nail polish too often.

The price is comparable to stick on nails, but I didn't want to try stick on nails because they generally look terrible against my skin tone and catch my hair with the glue pads if I run my fingers through my hair.

So my investigation brought me to Rebel Nails. I loved the look and price so ordered some to try.
I watched the video on how to apply them and tried it for myself. I loved them, but I needed more practice really to make them perfect.

I am now on my sixth or seventh set and I am a bit of a pro. I wear them whenever I have an excuse really, and I always get lovely comments about my nails and where I got them "done".

I have converted so many people to these as well, they look just fabulous for a night out. I would say they last five days maximum on the fingers, but up to six weeks on the toes. The only reason I had to take them off was to cut my toe nails!

Enter the R8Beauty giveaway to win some of your very own here
http://apps.facebook.com/sweepstakeshq/contests/58745

So now on the to the "nail" candy pictures! Click on them to make them larger.


Under £10 for a nail finish you just can't get with polish!


Some common problems when using Rebel Nails for the first time, it gets better I promise!


On my way to a party!
On the beach on holiday!

In the Surf on holiday! Really good action shot, no?!


Enter the giveaway to win some of your very own here
http://apps.facebook.com/sweepstakeshq/contests/58745

Thursday 9 September 2010

Smash and Grab Make up

When I am running late, which is quite often as I am very good at getting everything else ready, just not myself, this is my gotta get going make up. Often applied in the car if hubby is driving!


So here is my smash and grab list!


Beauty Without Cruelty Tinted Moisturiser in Medium
Urban Decay Mineral Foundation in Vision
Sleek Blusher in Coral
Nip and Fab Under Eye Concealer and Brightener
e.l.f Eye Liner Pen in Coffee
Alva Deep Black Mascara
Sleek Pout Polish in Perfect Plum

If I have time I delve in to my Urban Decay Naked Palette, if I don't have time for this then I take a bit of the Sleek blusher and place that in the eye socket.

All of these items never let me down. What are your smash and grab items!

ModestyBrown


I spent the afternoon with the lovely ModestyBrown. As soon as I realised that we lived close enough to each other to meet up without an epic journey, I invited her round for tea, cake and a makeover.

We discussed the kinds of looks and styles that Jane likes. We came up with two, an easy out the door look which makes you look like she's had a full night's sleep. The second was a smoky eye look suitable for Jane's eye shape and colouring.


We picked two; the first was inspired by Photographer Amy Dunn and is a natural and nude bronzed look.


Bare faced!


Jane bought with her a sample of Lancome's Photoluminescent foundation, it was quite similar to Nars Sheer Glow. It gave just enough natural coverage to even out the skin tone without covering freckles which I find looks really fresh and natural. I also used it as a concealer by using a smaller brush to apply another layer to any blemishes and under the eyes.


I then used Nip + Fab's under eye concealer and brightener which is quite pink based. This product is an excellent brightener but you have to work fast with the product before it dries and cakes. I find that applying with a brush (or the applicator brush) then blending with clean fingers works best.


Next we moved on the the eyes. Jane has gorgeous, large, clear blue eyes. Her eye shape I would describe as a mix of oriental (inner corner is slightly hooded) and round/deep set. It really is the first thing I noticed about Jane and I wanted to make the most of them.


Taking inspiration from the photograph, I applied an e.l.f's mineral eye shadow primer and matte mineral eye shadow in innocent as a base. I then applied a lightly shimmering cream shadow (from the BeeLuscious A/W 2009 palette called Canary Diamond) to the entire lid and up to the brow bone.

My technique for this eye shape is to apply a mid toned shadow on the outer and inner corners to fake out a deeper crease. I do not apply this shadow in the middle of the crease. This makes the eyes look rounder and less hooded. I used a mixture of Naked and Buck from the Urban Decay Naked palette.

I then applied an e.l.f waterproof liner pen in coffee between the lashes as a very thin line. This served to thicken out the lashes but doesn't close down the eye to make them smaller.

I applied an Alva organic deep black Mascara, naturally water resistant. For a day look I would use just a touch of mascara on top and bottom lashes just to add colour.

Next I used an eye brow wax and powder to frame Jane's eyebrows. I used e.l.f's eye brow kit in medium.

We move on to the lips, I used The Body Shop No 42 which is a pale and sheer peachy pink. Perfect for day time wear and does not require a mirror!


For blush I used a cream blush called Coco Spice from the BeeLuscious A/W 2008 palette followed by e.l.f Blush in Bronzed..


Here are the results, perfect for day wear. I think Jane looks amazingly fresh faced without looking overdone!


Jane's second look was a smoky look inspired by the Bobbi Brown Black Velvet collection. Black smoky eyes are fantastic for drama but if you just want to look good rather than like a wannabe model, it's best to tone it down to more muted colours. It is very rare to see a pure black smoky eye look, the same amount of drama becomes much more feminine if muted colours like blue, brown, plum and green are used instead of just black.


I used a dark bronze eye liner pencil to line the lower water and lash lines (MAC teddy, which Jane has). I then used it to mark out the outer corner of the the eyelid. Then I smudged it and applied eye shadows over the top. I spent ages blending to keep it looking natural. I graduated colours to the inner corner going from smoky brown to chocolate bronzes. I used the BeeLuscious palette again and mixed several brown and black shades (Cognac, Dark Angel, Goldspun and Amber Gold) to create a wearable smoky eye.

On the lips I used a nude gloss, e.l.f's caramel candy luscious liquid lipstick.


Meowwww Tiger!


Smoky night look, a close up.


When Jane got home she applied some false lashes, you can see these photos on her wonderful blog http://www.modestybrown.com/2010/09/my-afternoon-with-oxford-jasmine_09.html . I heartily recommend you head over for a read and follow Jane's blog.


I thoroughly enjoyed talking and gossipping with Jane about blogging and make up, I hope you like the make overs!

Wednesday 8 September 2010

OPI Up Front and Personal

More nail maths! e.l.f Desert Haze + O.P.I Up Front and Personal = Adorable nails!


After a day of loving Desert Haze I decided to be brave and try something different. I painted a light layer of O.P.I's Up Front and Personal and I was very pleased with the results. Up Front and Personal is a gorgeous glittery gold colour but the glitter is superfine and not gritty at all. It really works in harmony with Desert Haze and neither nail polish overpowers the other. I would wear this during the day although it is a bit glittery but would definitely wear this at night. I think this combination is perfect for summer and autumn.

I have been wearing this combination for three days (four in total for Desert Haze). There has been zero chipping but some tip wear on my left hand. There has been a bit of chipping on my ring and little finger on my right hand. I used a base coat of clear nail varnish but no top coat, so I expect it would last even longer with a top coat too.

I don't think the photographs do this combination any justice, I can only suggest that if you like the sound of it, try it!


I am affiliated with e.l.f Cosmetics UK but this is not a sponsored post.

Tuesday 7 September 2010

New e.l.f Autumn nail colours

New Autumnal shades plus a clear matte top coat released from e.l.f UK today!
The big news is that the clear mattifyer is here! It works really well and I've been using it to create cunningly disguised patterns on my nails. It's a really good way to make a work appropriate colour more interesting, applying in stripes and dots so only those very close up can tell. But you know it's there!
As ever, click on any of the images for a larger version.
New nail polish additions

Rosy Raisin
Rosy Raisin plus matte top coat


Red Velvet

Red Velvet plus matte topcoat
Purple Pleaser

Purple Pleaser with matte topcoat

Cranberry
Cranberry plus matte topcoat
Although Red Velvet and Cranberry look similar, Cranberry is a deeper shade of red. Purple pleaser is a deep indigo plum and looks lovely when used with the matte topcoat. Perfectly understated but colourful at the same time!
Apply gently to avoid streaks with the matte colours as they are less forgiving than shimmery ones and shake well to homogenise the polish. The matte topcoat is really easy to apply, try to avoid getting it on the skin as if you're a nail polish picker like me, it will easily come off but you might end up peeling the rest off as well!
I am affiliated with e.l.f but this is not a sponsored post.

Friday 3 September 2010

Nip + Fab Instant Fix

I was lucky enough to get my mitts on some samples of Nip + Fab, the "real results and instant fix" products launched today. I especially like the Brightening Eye Concealer, a little goes a long way so go easy, but if you have very dark circles then it's a lovely brightening formula which dries quickly so it doesn't crease. I also am loving the Lip and Nip fix, I haven't used it on my nips but on the lips it's a gorgeous balm (much like Arden's 8hr but without the heavy scent and taste). I am very much looking forward to using the Tummy Fix Daily Ab Toner, the active ingredient is caffeine which I think helps with water retention.

The range starts from £7.95 and up to about £19. At the moment it is available in Harvey "Nicks" in store and on line.


Here's a short video about the range and some details about how you can get your mitts on some products to review for R8Beauty. I am one of the team members for R8Beauty so if you have any queries about it, feel free to ask me!


Thursday 2 September 2010

When to say No.

I am approached nearly daily by beauty PR agencies and brands that want to advertise in some way on my OxfordJasmine blog and YouTube. I am always on the lookout for exciting new products to try and tell you about. But half the time I wouldn’t get to hear about it otherwise without this vital contact.

This isn’t a post ranting about PR agencies and the ramifications of paid for posts, sorry. I have no problem with either of those subjects and I don't want to rehash old arguments. PR intervention in blogging is here to stay but it is up to us to set the rules, each to their own. This is just a post offering insight in to my decision making process as to whether I accept an offer to review.

When considering an offer from a company, firstly I ask myself

Does their product excite me? If it excites me then it is likely to be an interesting read for you.
Do I really want to try it?
Would I buy it to review anyway? If not, why not?
Is it cruelty free?
Is it accessible for the majority of my audience?
Who else have they approached (everyone?)?
Does this product reflect my style and persona?

Secondly, I consider the tone and language of the email itself.

Is this a general email, am I addressed by name?
What are they offering in return for my help? This is really important. If it’s someone I know and like then it’s a no brainer. If it’s someone new and unfamiliar then I have to consider whether they deserve my help! I am helping, this is not a formal contractual arrangement or service I am providing! I am putting in my “professional” opinion and time. Not to mention photographing, videoing and all of those take resources and time.
Is my blog or YouTube mentioned?
Do they know I am a cruelty free reviewer?

Then I research the company, especially if I haven’t heard of them before

Main website - about the company
In the news?
Products
Cruelty free
Availability
Are there any other reviews?

Then I make my decision and sometimes I reply, and sometimes I do not.

Now I also approach companies, to review their products, based on my research of their products, ethos and willingness to engage with social media. I have always assumed they will say no, which I think is the best way to prepare yourself! If they say no, which so far they haven’t, and I am sufficiently interested, I will buy the product and review it anyway, no hard feelings.

I also approach bloggers and YouTube reviewers as part of my job. I am extremely good at it because I have been on the other side too. I cannot be anything but honest and I am choosy about who I contact and why. I am always polite and often my emails come as a nice surprise! I offer the reviewer the opportunity to choose their items for review, unless it is for a particular launch. I don’t expect a review on every single item, or even at all. I am happy to receive feedback privately or via a post or video. It’s all really useful.

There are distinct similarities between reviewing and purchase decision making. We know that brands spend a lot of effort, time and money considering their marketing messages to their customers. You may think I mean you, but I don’t. You and I are secondary customers for most make up brands. The primary customer is not a person but a business like a department store or Boots/Superdrug. We buy what they set out for us. Direct to consumer is the way forwards for purchasing as they really do want to know what you think to make their products better.

The conclusion I have reached and the advice I want to give is this:

Never be afraid to say No and stay true to your blog and its audience.

What do you think?

Wednesday 1 September 2010

Blackberry picking!

Just a quickie post about my Bank Holiday Monday adventure! As a child I used to always bring home handfuls of blackberries and my sister would make a pie so for the first time since then I have made my own!


Take 300g of blackberries (I froze the rest for jam making later)


Soak and rinse them thoroughly.


Chop up an apple and a pear and add to the blackberries in a wide baking dish.


Make a crumble topping from 225g plain flour, 110g butter and 75g brown sugar.


Cook at 180 degrees Celcius for 40 mins.


Eat whilst still warm!


Blackberries, it's got to be done!

Related Posts with Thumbnails